[Android/Java] BottomNavigationView 구성하기

안드로이드 어플리케이션에서 하단에 네비게이션을 두고 화면을 이동할 수 있는 BottomNavigationView를 구현하는 방법에 대한 기록 포스팅이다. 스크롤의 유지 여부를 확인하기 위해서 각 프래그먼트에는 컬러 TextView가 배치되어 있다.
1. 프로젝트 생성

프로젝트를 생성할 때 보면 메뉴에 "Bottom Navigation Views Activity"가 존재하는데 버전이나 언어에 따라 다를 수 있겠지만 나는 이걸로 생성하면 오류가 정말 많이 났다. 처음에 바텀 네비게이션을 구현할 때 이걸로 프로젝트를 만들어 기본 코드를 분석하려 했는데 기본 코드임에도 불구하고 갖은 오류가 발생해 빌드조차 되지 않았었다. 그래서 나는 빈 프로젝트에 바텀 네비게이션을 구현하는 것에 더 익숙하기에 빈 프로젝트로 예제를 시작할 것이다.
2. build.gradle에 의존성 주입 확인
dependencies {
    ..
    implementation 'com.google.android.material:material:1.9.0'
    implementation 'androidx.navigation:navigation-fragment:2.6.0'
    implementation 'androidx.navigation:navigation-ui:2.6.0'
    ..
}
"com.google.android.material"의 경우 어느 시점부터 프로젝트를 만들면 자동으로 등록되기 시작했기에 버전에 따라 기본적으로 있을 수도 있고 없을 수도 있다. 없을 경우 직접 추가해주면 된다.
추가로 아래 "androidx.navigation*" 두 개를 추가해준다. material은 바텀 네비게이션 자체를 사용하기 위함이었다면 아래 두 개는 바텀 네비게이션으로 프래그먼트를 제어하기 위해 추가한 것이다.
3. menu 생성하기
바텀 네비게이션의 각 항목(이하 메뉴)에 표시할 이름 리소스 파일을 작성한다.
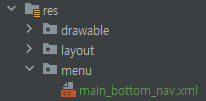
먼저 [res 폴더 우클릭 → New → Android Resource Directory] 에서 "menu"를 입력해 디렉터리를 생성한다. 그리고 [menu 폴더 우클릭 → New → Menu Resource File]을 통해 메뉴를 작성할 파일을 생성한다.
참고로 "res/navigation" 폴더를 생성하여 만드는 방법도 있는데 그 경우 버전이 높은 navigation에 대한 의존성을 따로 주입해줘야 한다. 최신 버전이긴 하지만 그에 따라 컴파일 버전도 손을 봐야하니 잘 모르면 그냥 넘어가는 것이 좋다.
<?xml version="1.0" encoding="utf-8"?>
<menu xmlns:android="http://schemas.android.com/apk/res/android">
    <item
        android:id="@+id/menu_main_bottom_home"
        android:enabled="true"
        android:icon="@drawable/baseline_home_24"
        android:title="홈"/>
    <item
        android:id="@+id/menu_main_bottom_chat"
        android:enabled="true"
        android:icon="@drawable/baseline_mode_comment_24"
        android:title="대화"/>
    <item
        android:id="@+id/menu_main_bottom_search"
        android:enabled="true"
        android:icon="@drawable/baseline_search_24"
        android:title="검색"/>
    <item
        android:id="@+id/menu_main_bottom_setting"
        android:enabled="true"
        android:icon="@drawable/baseline_settings_24"
        android:title="설정"/>
</menu>
이 파일은 루트 태그로 <menu>를 가지며 <item> 태그로 각 항목을 생성한다. 각 아이템에는 식별을 위한 id, 메뉴 활성화 여부, 표시할 아이콘, 표시할 텍스트 등을 지정할 수 있다.
여기서 사용된 이미지 아이콘은 모두 안드로이드 스튜디오의 Vector Asset을 통해 생성한 것을 사용하였다.
4. *.xml 작성하기
<?xml version="1.0" encoding="utf-8"?>
<androidx.constraintlayout.widget.ConstraintLayout
    xmlns:android="http://schemas.android.com/apk/res/android"
    xmlns:app="http://schemas.android.com/apk/res-auto"
    xmlns:tools="http://schemas.android.com/tools"
    android:layout_width="match_parent"
    android:layout_height="match_parent"
    tools:context=".MainActivity">

    <androidx.fragment.app.FragmentContainerView
        android:id="@+id/activity_main_container_view"
        android:layout_width="match_parent"
        android:layout_height="0dp"
        app:layout_constraintBottom_toTopOf="@id/activity_main_bottom_navigation_view"
        app:layout_constraintTop_toTopOf="parent" />

    <com.google.android.material.bottomnavigation.BottomNavigationView
        android:id="@+id/activity_main_bottom_navigation_view"
        android:layout_width="match_parent"
        android:layout_height="wrap_content"
        app:labelVisibilityMode="labeled"
        app:layout_constraintBottom_toBottomOf="parent"
        app:layout_constraintTop_toBottomOf="@id/activity_main_container_view"
        app:menu="@menu/main_bottom_nav" />

</androidx.constraintlayout.widget.ConstraintLayout>
바텀 네비게이션을 적용할 layout xml을 작성한다. 화면에는 단 두 개의 뷰만 존재하는 것을 볼 수 있는데 하나는 Fragment를 교체하면서 보여줄 FragmentContainerView이고 나머지 하나는 표시할 Fragment를 결정할 BottomNavigationView다.
BottomNavigationView에 사용된 속성을 보면 menu 속성을 통해 앞서 생성한 리소스를 적용한 것을 볼 수 있다. 또 사용된 옵션 중에는 labelVisibilityMode가 있는데 이 옵션은 네비게이션에 표시되는 항목에 대해 이미지만 보일 것인지, 텍스트(Label)도 같이 표시할 것인지 등을 지정할 수 있다.
labelVisibilityMode에 사용 가능한 값
- auto : 항목이 3개 이하일 경우 labbeled, 4개 이상일 경우 selected
- labeled : 텍스트를 항상 표시
- selected : 선택된 항목에 대해서만 텍스트를 표시
- unlabeled : 텍스트를 항상 숨김
5. Fragment 생성하기
바텀 네비게이션을 통해 ContainerView에 표시할 Fragment를 네비게이션 항목 수에 맞게 생성한다. 나는 4개의 항목을 생성했으므로 총 4개를 생성했는데 예제인 만큼 구분이 편하도록 이름은 넘버링을 붙여 생성했다.
public class FirstFragment extends Fragment {

    public static FirstFragment newInstance() {
        return new FirstFragment();
    }

    @Override
    public View onCreateView(LayoutInflater inflater, ViewGroup container,
                             Bundle savedInstanceState) {
        return inflater.inflate(R.layout.fragment_first, container, false);
    }
}
구현할 기능은 딱히 없으므로 객체를 생성하는 newInstance 메서드만 존재한다.
<?xml version="1.0" encoding="utf-8"?>
<ScrollView xmlns:android="http://schemas.android.com/apk/res/android"
    xmlns:tools="http://schemas.android.com/tools"
    android:layout_width="match_parent"
    android:layout_height="match_parent"
    tools:context=".FirstFragment">

    <androidx.appcompat.widget.LinearLayoutCompat
        android:layout_width="match_parent"
        android:layout_height="wrap_content"
        android:orientation="vertical">

        <androidx.appcompat.widget.AppCompatTextView
            android:layout_width="match_parent"
            android:layout_height="300dp"
            android:background="@color/yellow"
            android:gravity="center"
            android:text="Fragment 1-1"
            android:textColor="@color/black" />

        <androidx.appcompat.widget.AppCompatTextView
            android:layout_width="match_parent"
            android:layout_height="400dp"
            android:background="@color/turquoise"
            android:gravity="center"
            android:text="Fragment 1-2"
            android:textColor="@color/black" />

        <androidx.appcompat.widget.AppCompatTextView
            android:layout_width="match_parent"
            android:layout_height="400dp"
            android:background="@color/silver"
            android:gravity="center"
            android:text="Fragment 1-3"
            android:textColor="@color/black" />

        <androidx.appcompat.widget.AppCompatTextView
            android:layout_width="match_parent"
            android:layout_height="400dp"
            android:background="@color/turquoise"
            android:gravity="center"
            android:text="Fragment 1-4"
            android:textColor="@color/black" />

        <androidx.appcompat.widget.AppCompatTextView
            android:layout_width="match_parent"
            android:layout_height="400dp"
            android:background="@color/yellow"
            android:gravity="center"
            android:text="Fragment 1-5"
            android:textColor="@color/black" />

    </androidx.appcompat.widget.LinearLayoutCompat>

</ScrollView>
스크롤을 확인하기 위해 ScrollView를 배치하고 내부에 TextView를 5개 배치하였다. 화면이 이동되는 와중에 스크롤이 유지되는지 확인하기 위함이다. 프래그먼트 4개의 레이아웃은 모두 같으며 TextView의 text만 다르다.
Fragment 띄우기
public class MainActivity extends AppCompatActivity {
    private ActivityMainBinding binding;

    private FirstFragment fragment1;
    private SecondFragment fragment2;
    private ThirdFragment fragment3;
    private FourthFragment fragment4;

    private final String TAG = "TAG_MainActivity";

    @Override
    protected void onCreate(Bundle savedInstanceState) {
        super.onCreate(savedInstanceState);
        binding = ActivityMainBinding.inflate(getLayoutInflater());
        setContentView(binding.getRoot());

        setupBottomNavigation();
    }

    private void setupBottomNavigation() {
        BottomNavigationView bottomNav = binding.activityMainBottomNavigationView;
        addFragment(fragment1 = FirstFragment.newInstance());

        bottomNav.setOnItemSelectedListener(item -> {
            int selectedItemId = item.getItemId();

            if (selectedItemId == R.id.menu_main_bottom_chat) {
                if (fragment2 == null)
                    addFragment(fragment2 = SecondFragment.newInstance());
            } else if (selectedItemId == R.id.menu_main_bottom_search) {
                if (fragment3 == null)
                    addFragment(fragment3 = ThirdFragment.newInstance());
            } else if (selectedItemId == R.id.menu_main_bottom_setting) {
                if (fragment4 == null)
                    addFragment(fragment4 = FourthFragment.newInstance());
            }

            replaceFragment(selectedItemId);
            return true;
        });
    }

    private void addFragment(Fragment fragment) {
        getSupportFragmentManager()
                .beginTransaction()
                .add(binding.activityMainContainerView.getId(), fragment)
                .commit();
    }

    private void replaceFragment(int selectedMenuId) {
        FragmentTransaction fragmentTransaction = getSupportFragmentManager()
                .beginTransaction();

        if (selectedMenuId == R.id.menu_main_bottom_home)
            fragmentTransaction.show(fragment1);
        else
            fragmentTransaction.hide(fragment1);

        if (selectedMenuId == R.id.menu_main_bottom_chat)
            fragmentTransaction.show(fragment2);
        else if (fragment2 != null)
            fragmentTransaction.hide(fragment2);

        if (selectedMenuId == R.id.menu_main_bottom_search)
            fragmentTransaction.show(fragment3);
        else if (fragment3 != null)
            fragmentTransaction.hide(fragment3);

        if (selectedMenuId == R.id.menu_main_bottom_setting)
            fragmentTransaction.show(fragment4);
        else if (fragment4 != null)
            fragmentTransaction.hide(fragment4);

        fragmentTransaction.commit();
    }
}
Fragment를 표시할 Container View를 가진 MainActivity다.
Fragment들은 모두 멤버 변수로 선언하였다. 메뉴의 항목이 눌릴 때 마다 매번 새로운 프래그먼트를 만들어줄 것이 아니라면 굳이 멤버 변수로 생성하지 않을 이유가 없다.(배열로 관리해도 된다.)

화면이 초기화되는 시점에서는 컨테이너에 최초로 표시되는 프래그먼트가 있어야 하므로 FirstFragment를 컨테이너에 추가한다. 그리고 네비게이션의 각 항목이 선택될 때마다 이벤트를 처리할 리스너를 작성한다. 특정 항목이 선택되면 먼저 선택된 항목이 최초로 선택된 것인지 확인(== null)하여 최초 선택이 아닐 경우 객체를 초기화하면서 컨테이너에 프래그먼트를 추가한다.
조건문까지는 모든 프래그먼트를 최초 1회 실행시켜주는 구문이었다. 그럼 이제 프래그먼트가 재차 눌렸을 때 프래그먼트를 다시 표시하는, 즉 컨테이너의 프래그먼트를 전환해야 하는데 조건문 이후 호출되는 replaceFragment 메서드가 그 역할을 한다.

replaceFragment에서 볼 코드는 show/hide 메서드를 호출하는 부분이다. 컨테이너에 모든 프래그먼트가 추가된 상태에서 특정 프래그먼트만을 보여주기 위해 나머지 모든 프래그먼트를 hide 상태로 만든다.

결과를 확인하면 프래그먼트 이동 시 이전 프래그먼트에서 발생한 스크롤이 그대로 유지되어 있는 것을 볼 수 있다.